Intro
After successfully overcame my procrastination and initialized my Raspberry Pi 3, I begin to play with it a little bit. And in this blog, I will go through my own path to configure the SSH connection, static IP address, etc.
SSH
In order to allow SSH connection to our Raspberry Pi 3, there are a couple of things to do.
Rumor has it…
From what I heard, SSH is disabled bydefault in Raspbian after 2016.11. As is officialy commented:
SSH disabled by default; can be enabled by creating a file with name “ssh” in boot partition.
Hence, one of the way to tackle this is as easy as following:
$ cd /boot
$ sudo touch ssh
$ sudo reboot
Raspi-Config
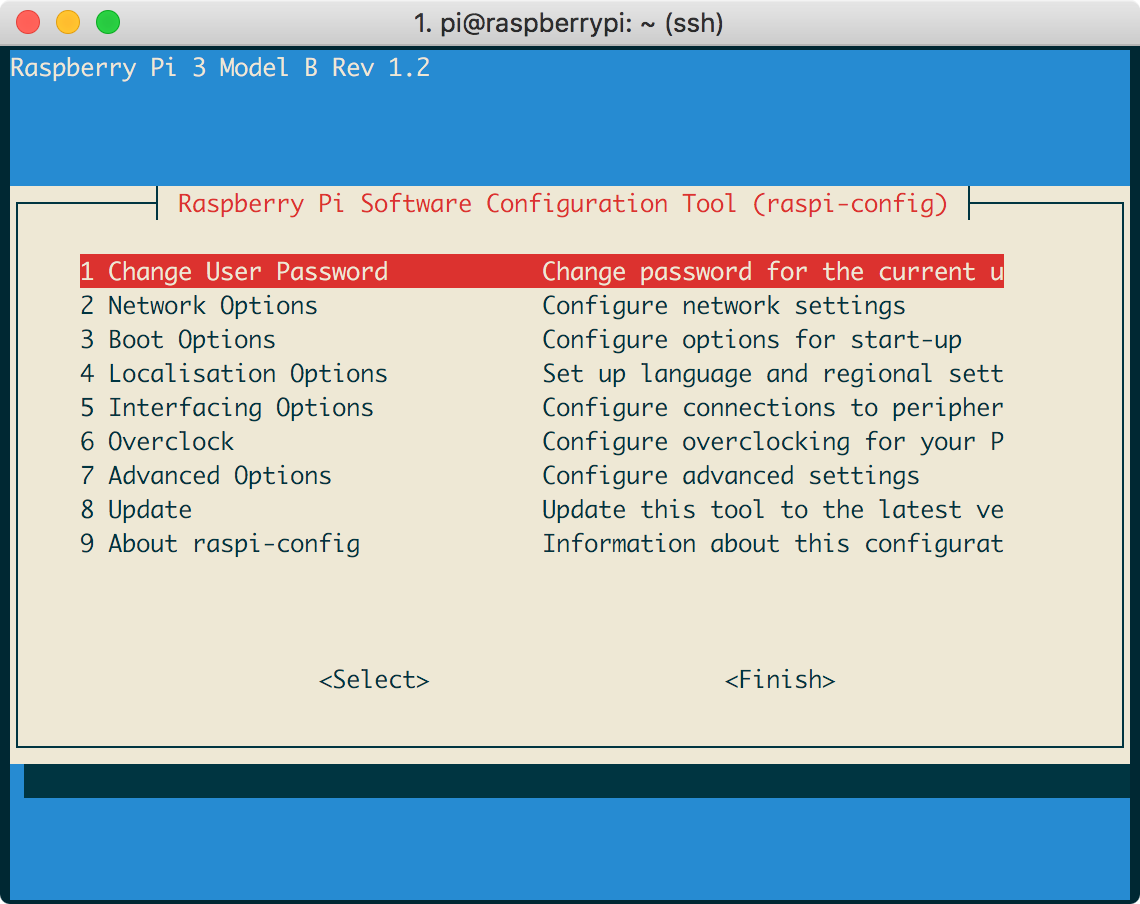
A more decent way to allow SSH on Raspberry Pi 3 is to use raspi-config. In your terminal, type:
$ sudo raspi-config
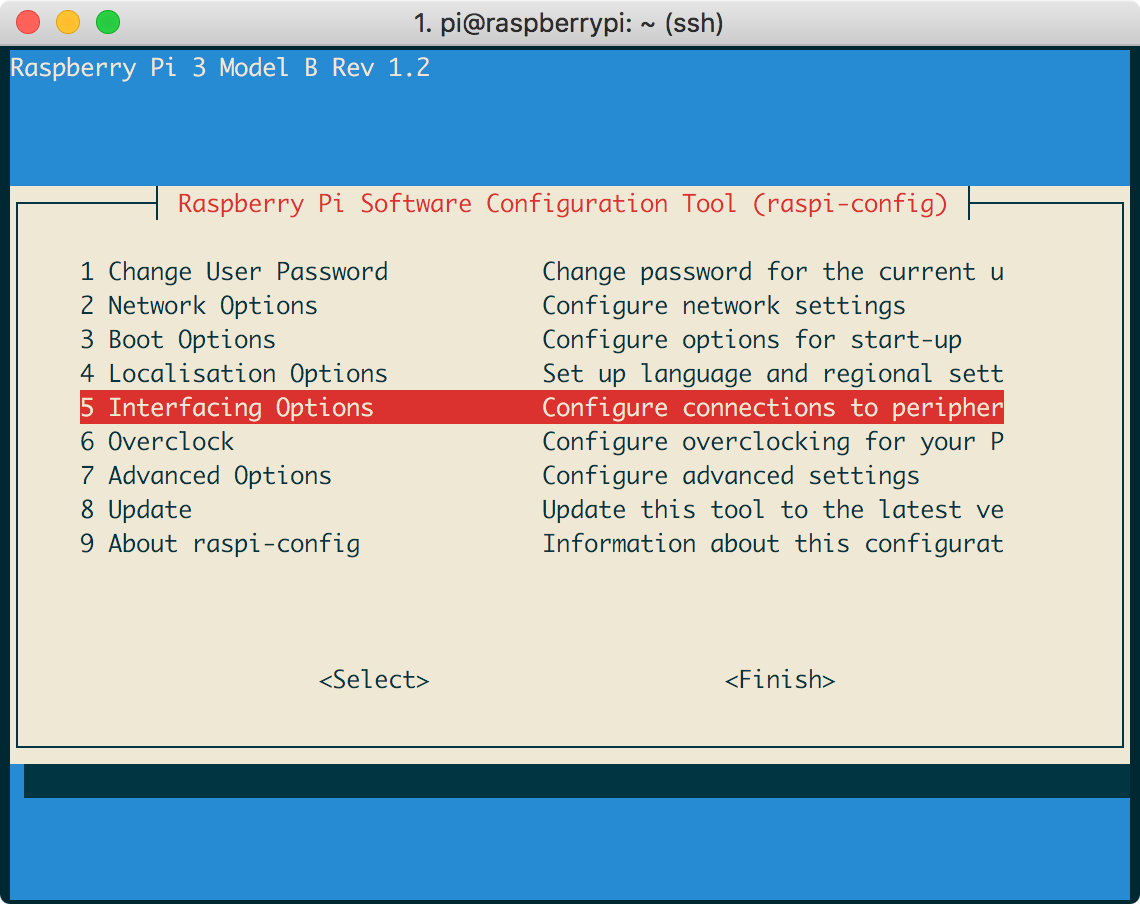
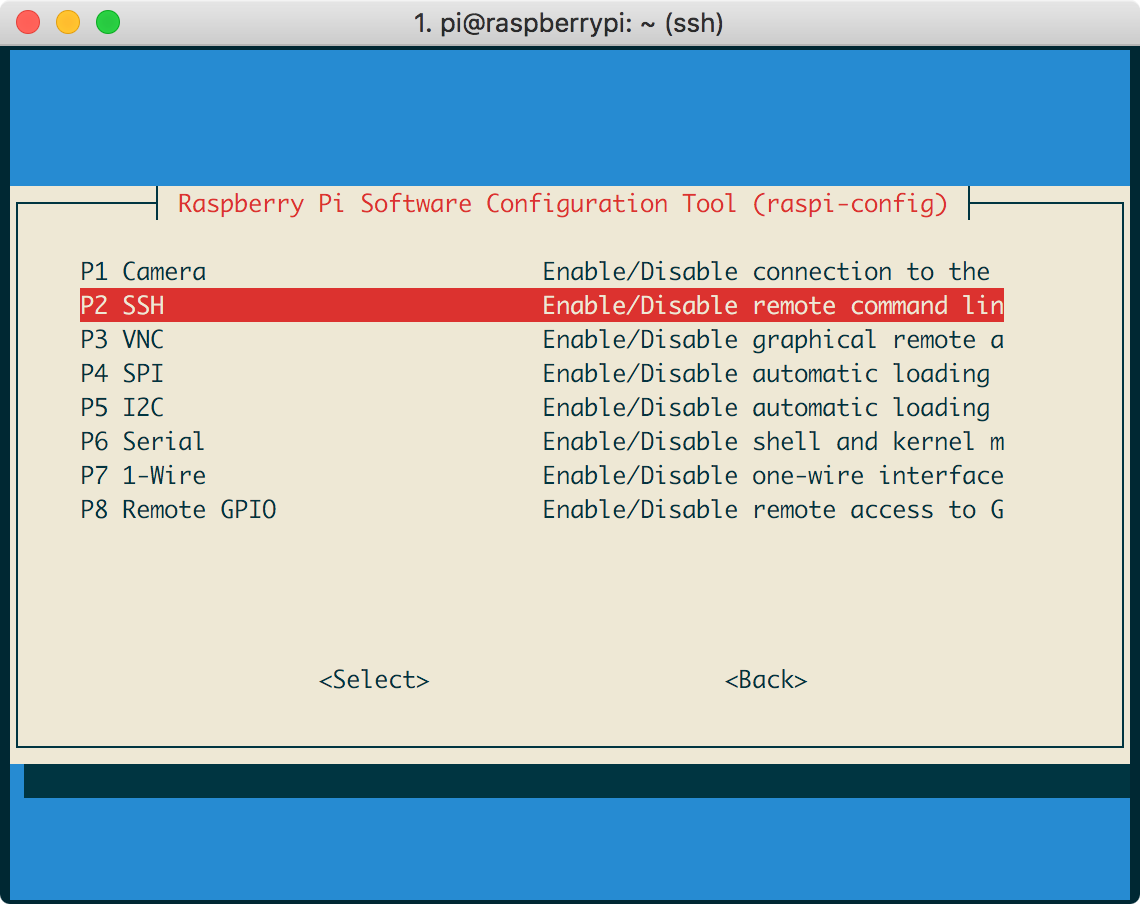
then, following are the instructions afterwards.
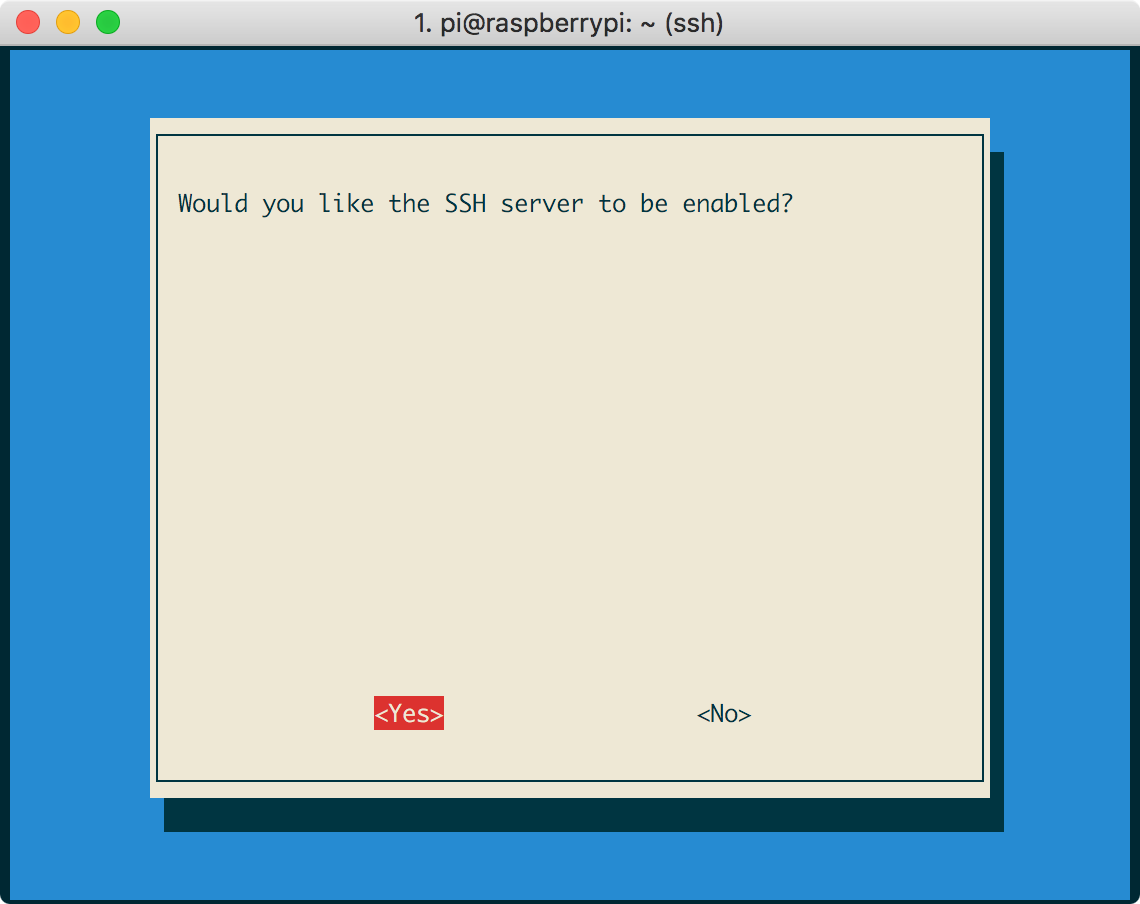
Then it should be good to go!
IP Address
Now the Raspberry Pi is ready to be connected via SSH. But we need the IP address to get it connected. Then here comes a problem, whenever the RPi is rebooted or reconnected to the router, chances are that it will be re-assigned with a new IP address from DHCP. Hence, there are two ways to tackle it:
- Check the Raspberry Pi’s IP address each time before you want to connect to it via SSH while you are not sure.
- Configure static IP address
Arp-Scan
Well, there are ways to scan and recognize the IP address in the local network. For example, we can use arp-scan.
First, we need to install arp-scan.
# For Mac
$ brew install arp-scan
# For Ubuntu
$ sudo apt-get arp-scan
Then, by scanning the Internet:
$ arp-scan --interface en0 --localnet
we can get the result:
Interface: en0, datalink type: EN10MB (Ethernet)
Starting arp-scan 1.9 with 256 hosts (http://www.nta-monitor.com/tools/arp-scan/)
192.168.1.1 b0:59:47:26:e8:c2   (Unknown)
192.168.1.50    b8:27:eb:fc:a2:79   Raspberry Pi Foundation
192.168.1.79    3c:2e:ff:55:70:58   (Unknown)
192.168.1.254   64:7c:34:20:8a:b8   Ubee Interactive Corp.

672 packets received by filter, 0 packets dropped by kernel
Ending arp-scan 1.9: 256 hosts scanned in 1.865 seconds (137.27 hosts/sec). 4 responded
Thus, we can recognize that the Raspberry Pi has the address 192.168.1.50.
Note:
- Since
arp-scanhas rather lower version, hence sometimes the host’s name is Unknown.- Another way to recognize Raspberry Pi if you cannot identify your device by host name, you can check the link layer address (MAC address) since the MAC address of all Raspberry Pi starts with
b8:27:3b.- One line cmd:
arp-scan --interface en0 --localnet | grep grep b8:27:eb
Static IP Address
Remember last time, I have already configured Wi-Fi connection. (See last post) In order to let our Raspberry Pi have a static IP address, which means whenever our RPi is connected to the Wi-Fi, it will have the same IP address (as far as I know), we have to manually configure the IP address. The way to do it is fairly simple:
- Open up
/etc/dhcpcd.conf($ sudo nano /etc/dhcpcd.conf) - Scroll all the way to the bottom and add the following:
interface eth0
static ip_address=10.1.10.100/24
static routers=10.1.10.1
static domain_name_servers=10.1.10.1

interface wlan0
static ip_address=10.1.10.101/24
static routers=10.1.10.1
static domain_name_servers=10.1.10.1
Note:
- The
static ip_addressvalues are whatever you want your IP address for the Pi to be. Above is just an example.- Actually, it is more complex than this. I have tried many other solutions but they just don’t work.
Now that we have successfully identified the IP address of our Raspberry Pi, we can get started with connecting to our Raspberry Pi via SSH.
Make SSH Easier and Safer
Easier
I felt pretty exhausted times after times typing ssh [email protected]. Hence, I decided to create my own alias in ~/.zshrc (BTW. I am using zsh):
# SSH connect to Raspberry Pi through default Wi-Fi address
alias sshpi="ssh [email protected]"
By doing this, whenever I want to connect to RPi via SSH, I could just type $ sshpi in my terminal.
Safer
Even though I can save my time from typing ssh [email protected], I still need to type my password afterwards. This procedure can be not only troublesome but also dangerous in some cases. So I decided to encapsulate my password in my laptop.
Check for existing SSH keys
First, check whether there are already keys on the computer you are using to connect to the Raspberry Pi:
$ ls ~/.ssh
If you see files named id_rsa.pub or id_dsa.pub you have keys set up already, so you can skip the generating keys step (or delete these files with rm id* and make new keys).
Generate new SSH keys
To generate new SSH keys enter the following command (Choose a sensible hostname such as <YOURNANME>@<YOURDEVICE> where we have used eben@pi):
$ ssh-keygen -t rsa -C eben@pi
You can also use a more descriptive comment using quotes if you have spaces, e.g. ssh-keygen -t rsa -C "Raspberry Pi #123"
Upon entering this command, you’ll be asked where to save the key. We suggest you save it in the default location (/home/pi/.ssh/id_rsa) by just hitting Enter.
You’ll also be asked to enter a passphrase. This is extra security which will make the key unusable without your passphrase, so if someone else copied your key, they could not impersonate you to gain access. If you choose to use a passphrase, type it here and press Enter, then type it again when prompted. Leave the field empty for no passphrase.
Now you should see the files id_rsa and id_rsa.pub in your .ssh directory in your home folder:
$ ls ~/.ssh
authorized_keys  id_rsa  id_rsa.pub  known_hosts
The id_rsa file is your private key. Keep this on your computer.
The id_rsa.pub file is your public key. This is what you put on machines you want to connect to. When the machine you try to connect to matches up your public and private key, it will allow you to connect.
Take a look at your public key to see what it looks like:
¥ cat ~/.ssh/id_rsa.pub
It should be in the form:
ssh-rsa <REALLY LONG STRING OF RANDOM CHARACTERS> eben@pi
Copy your public key to your Raspberry Pi
If your Pi does not have an .ssh directory you will need to set one up so that you can copy the key from your computer.
$ cd ~
$ install -d -m 700 ~/.ssh
To copy your public key to your Raspberry Pi, use the following command to append the public key to your authorized_keys file on the Pi, sending it over SSH:
$ cat ~/.ssh/id_rsa.pub | ssh <USERNAME>@<IP-ADDRESS> 'cat >> .ssh/authorized_keys'
Note that this time you will have to authenticate with your password.
Now try ssh <USER>@<IP-ADDRESS> or your own alias (in my case sshpi) and you should connect without a password prompt.
Conclusion
Now I have basically succeeded connecting to my Raspberry Pi via SSH and got rid of the annoying steps. More importantly, I made it safer than before! I will keep calm and play with RPi. Cheers!