Launch Instance

- Go to EC2 Dashboard
- Click ”Launch Instance”
- Click “Community AMI”
- Search for AMI “udacity-dl”
- Select AMI “udacity-dl”
Instance Type

- Filter by “GPU instances”
- Choose
g2.2xlargetype - Click “Review and Launch”
Set Storage
Since some dataset can reach several GB, we need enough space to store it. Make sure your instance has 32GB storage
- Click “Edit Storage”
- Increase storage to 32GB
- Click “Review and Launch” again
Security Group
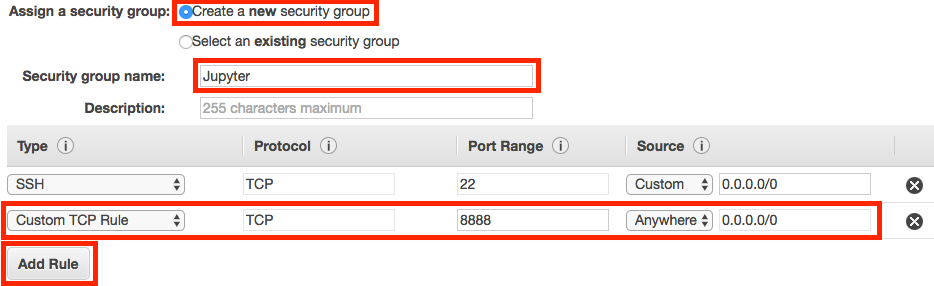
In the course of Udacity-DLND, we typically run several jupyter notebooks, whose port by default is 8888. Thus, in order to visit this port, we need to modify the security group on AWS.
- Click “Edit Security Group”
- Set Security Group
- Choose “Create a new security group”
- Name the security group as “Jupyter”
- Click “Add Rule”
- Set “Type” to “Custom TCP Rule”
- Set “Port Range” to
8888 - Set “Source” to “Anywhere”
- Click “Review and Launch” again
Once the security group “Jupyter” has been created, there is no need to create it again. From now on, whenever launching a new instance, just choose the security group “Jupyter”.
Launch
- Click “Launch” and we are good to go with our GPU instance
- Right now, AWS will ask us whether we are using key to identify. Just go with “without key” choice since AMI has the
Login
- Open terminal
- Input:
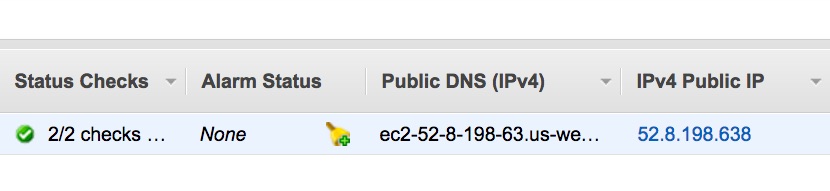
ssh [email protected], whereX.X.X.Xis the IPv4 Public IP we can find on AWS - Identification verification with password: “udacity”
- If you want to change your password, use command
passwd, and then you can use the new password to login the “udacity” instance
Run Your Code
Now that the instance has been setup, we can start running our notebook.
- Clone our code to the server on AWS with, e.g.
git clone https://github.com/ZhiyuanYaoJ/Udacity-DLND - Direct to one project with, e.g.
cd Udacity-DLND/Projects/1-first-nn - Activate our environment
source activate dl - Run the notebook
jupyter notebook - Open the browser and visit
X.X.X.X:8888, whereX.X.X.Xis the IP address of our EC2 instance - Now we are good to go!
Remember to Terminate!
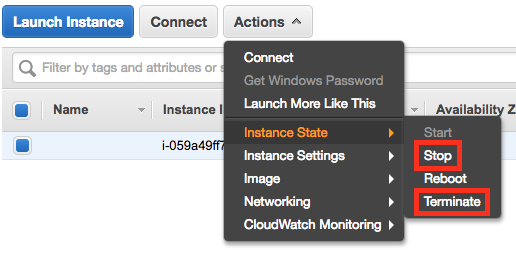
From the moment we launch our EC2 instance, AWS starts charge us. (BITCH!) So don’t forget to terminate the instances whenever we don’t use them anymore. Or else the instance might keep running for days, weeks, months… I’ve been through this before. Oh poor (stupid) me…
So, remember to terminate and save your money! :)